How to create a Micro Frontend application using React

There's a current trend in the software industry around microservices and micro frontends. The driver behind this is coming from the pain and frustration that many engineering teams feel when forced to work together on large complex systems.
We all know that breaking things down is the way to solve any software problem. Whether it's breaking down tickets, or refactoring your code in order to have smaller, more understandable functions. It's natural that we'd take the next step and break down our applications into smaller, more distinct chunks.
I'm not going to talk about microservices here, other than to mention that if you're going to attempt a micro frontend approach, you probably want to also consider breaking down that monolith into microservices as well.
Why bother?
- Simple, decoupled code based on journeys
- Teams can have full ownership and autonomy over parts of the application
- Each deployment will have smaller impact on the entire application, making it somewhat safer
What are my options?
The main two options in my mind are build time integration and run time integration. Both options will require you to split your front end in some sensible way, whether that is by user journey, page or collections of pages.
Build time integration
You will have a number of child front ends which will be available as npm packages. Using your framework of choice, you can then integrate them into a wrapper parent component, which will be the front end application that you deploy.
The main benefit of this option is that it is incredibly simple. I'll give a few more details below on how to achieve this, but you probably already have a good idea of how to do this yourself.
One major drawback to this method is that any change to a child component will require the parent to be rebuilt and redeployed.
This method also makes it very tempting to couple the parent and child
How to?
I won't go into much detail here as I want to spend more time talking about the run time integration, however, here are the high level steps for build time integration:- Build your child application(s)
- Export your router file
- Publish to npm (I'd recommend setting up a CI pipeline which will automatically do version bumping and publishing to npm)
- Add it as a node module in your parent application
- Integrate into the parent application router file
Run time integration

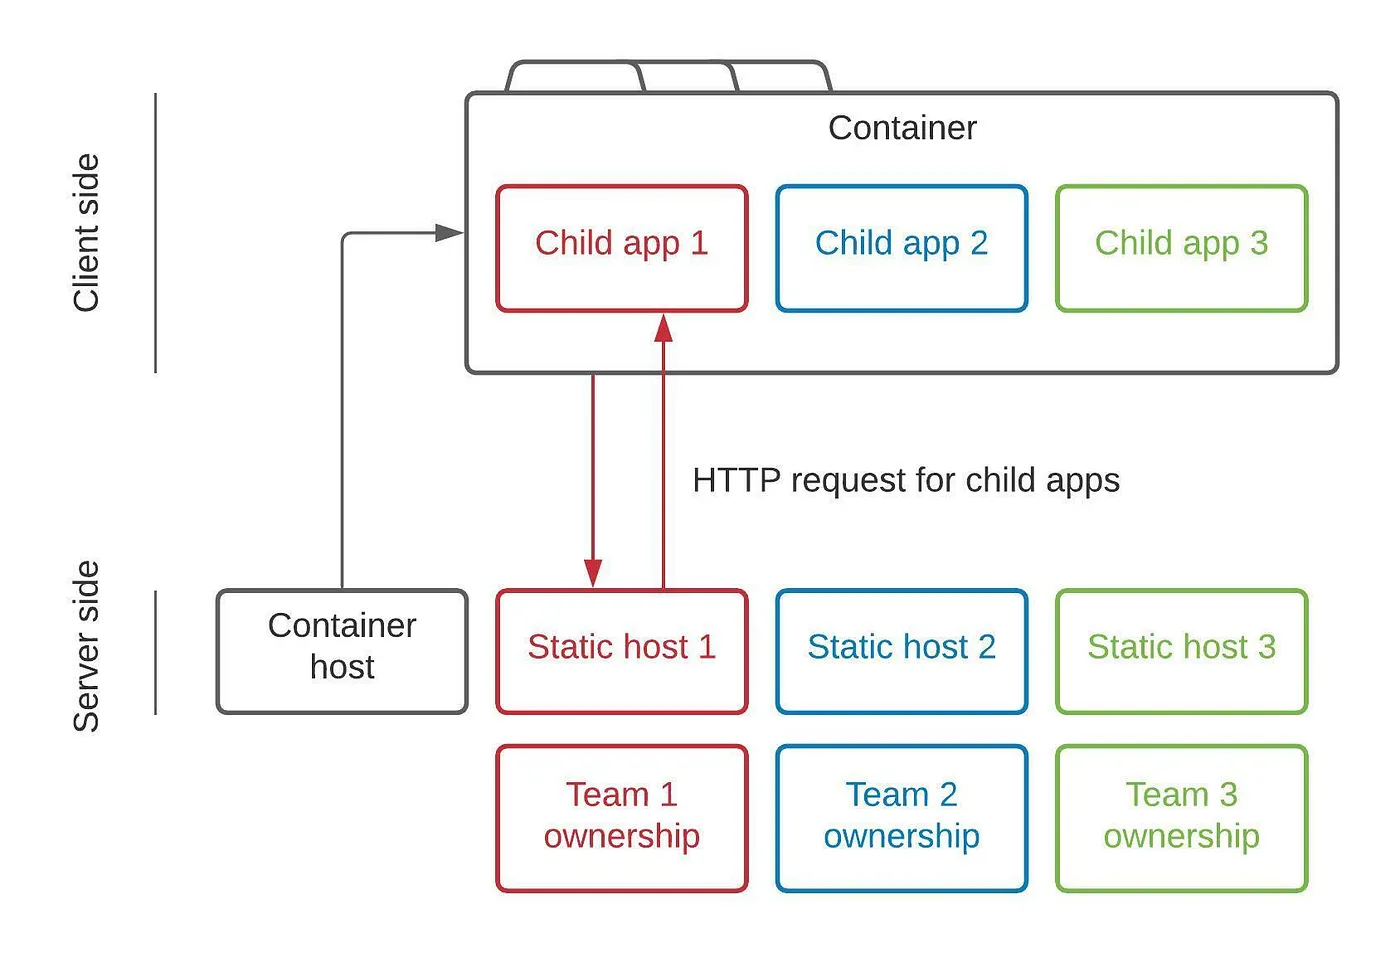
The container app and each child app are deployed and served independently. The container app will make HTTP requests at runtime to fetch the JavaScript required to render each child app as and when it is needed.
The main benefit here is that each child component can be kept completely decoupled to the point where you can use different frameworks for each child component if you really wanted to. Each child can be developed and deployed with no need to change the parent container (after initial set up). This means that teams can have full ownership and autonomy over how they do things, without affecting other teams.
This set up also makes it very easy to perform A/B testing as you can easily switch between two different child components if you have them deployed.
Having the ability to be framework agnostic means that in ten years time when React is no longer in vogue, you can incrementally move your application over to the new shiny thing without having to do a massive overhaul of the entire application at once.
The main downside to this approach is that it is quite complicated, so the rest of this article is going to focus on how to accomplish this.
How to?
We're going to make a very simple hello world application which will make use of micro frontend architecture. It will consist of a few child applications written in different JS frameworks which will simply printHello ${FRAMEWORK}! and a container which will pull it all together so that we can visit /react or /vue etc.For simplicity I'm going to keep all of my packages in the same repo, but there's no reason you can't do it in multiple repos.
Child #1 — helloReact
I'm not going to use create-react-app for this as we just need something basic. I'll start by adding my package.json file for this package and install my node modules.
// helloReact/package.json

{
  "name": "helloReact",
  "version": "1.0.0",
  "dependencies": {
    "react": "^17.0.1",
    "react-dom": "^17.0.1",
    "react-router-dom": "^5.2.0"
  },
  "devDependencies": {
    "@babel/core": "^7.12.3",
    "@babel/plugin-transform-runtime": "^7.12.1",
    "@babel/preset-env": "^7.12.1",
    "@babel/preset-react": "^7.12.1",
    "babel-loader": "^8.1.0",
    "clean-webpack-plugin": "^3.0.0",
    "html-webpack-plugin": "^4.5.0",
    "webpack": "^5.4.0",
    "webpack-cli": "^4.2.0",
    "webpack-dev-server": "^3.11.0",
    "webpack-merge": "^5.2.0"
  }
}
After installing my dependencies, I'll move onto creating our actual react app in all of it's complexity! I'm going to add an extra route into this app so that we can see how navigation works inside of a child app. Since the components are so simple, I'm leaving them in the same file, but I'd normally extract them into a components folder.
// helloReact/src/App.js

import React from 'react'
import { Switch, Route, Router } from 'react-router-dom'

const helloWorld = () => (<div>Hello World!</div>)
const helloReact = () => (<div>Hello React!</div>)

export default ({ history }) => {
    return <div>
        <Router history={history}>
            <Switch>
                <Route path="/react" component={helloReact} />
                <Route path="/" component={helloWorld} />
            </Switch>
        </Router>
    </div>
}
Next let's create an index file that we will use to render our React component. This file helps us while we're developing this component, but it will not be used in production (more on that in a follow up post).
<!-- helloReact/public/index.html -->

<!DOCTYPE html>
<html>
  <head></head>

  <body>
      <div id='hello-react-dev-app'></div>
  </body>
</html>
Next we need to mount our react app on the DOM. To do this we need to add these two files to our helloReact/src folder.
// helloReact/src/bootstrap.js

import React from 'react'
import ReactDOM from 'react-dom'
import App from './App'
import { createBrowserHistory } from 'history'

const mount = (el) => {
    const history = createBrowserHistory()

    ReactDOM.render(
        <App history={history} />,
        el
    )
}

if ("production" === 'development') {
    const devRoot = document.querySelector('#hello-react-dev-app')
    if (devRoot) {
        mount(devRoot)
    }
}

export { mount }
// helloReact/src/index.js
import('./bootstrap.js')The reason we have an import function in the index file is so that webpack can load our JavaScript asynchronously. If we just used the bootstrap file and our application had any sort of shared dependency that it was importing and then immediately using, we would run into issues with how webpack tries to load the files.
The bootstrap file simply creates a browser history object to pass into the app and renders our react application on the div with an id in the index.html file above. We've got a condition in there that we'll only do this in development as we'll be doing something slightly different when this app is integrated into the parent container.
Now let's get into webpack so that we can actually see this running. Both these files will go into a `config` folder
// helloReact/config/webpack.common.js

module.exports = {
  module: {
      rules: [
          {
              test: /.m?js$/,
              exclude: /node_modules/,
              use: {
                  loader: 'babel-loader',
                  options: {
                      presets: ['@babel/preset-react', '@babel/preset-env'],
                      plugins: ['@babel/plugin-transform-runtime'],
                  }
              }
          }
      ]
  }
}
// helloReact/config/webpack.dev.js
const { merge } = require('webpack-merge')
const HtmlWebpackPlugin = require('html-webpack-plugin')
const commonConfig = require('./webpack.common')
const ModuleFederationPlugin = require('webpack/lib/container/ModuleFederationPlugin')
const packageJson = require('../package.json')
const devConfig = {
mode: 'development',
output: {
publicPath: 'http://localhost:8081/',
},
devServer: {
port: 8081,
historyApiFallback: {
index: '/index.html'
}
},
plugins: [
new ModuleFederationPlugin({
name: 'helloReact',
filename: 'remoteEntry.js',
exposes: {
'./HelloReactApp': './src/bootstrap'
},
shared: packageJson.dependencies
}),
new HtmlWebpackPlugin({
template: './public/index.html'
})
]
};
module.exports = merge(commonConfig, devConfig)I've included a webpack.common.js file here which has common settings we'll use for dev and production. In the dev file there are a few things to make note of:
- publicPath and port — these should have the same port number. I've chosen 8081 as I intend to put my main container application on 8080.
- historyApiFallback — the index.html file will be served in place of any 404 response.
- ModuleFederationPlugin — this is what ties all of the micro frontends together. The values that you put in here will become important when we go to implement the container.
- name — will be used to reference this package from the container
- filename — the name given to the bundled JavaScript
- exposes — when a file tries to import './HelloReactApp' it will actually import './src/bootstrap'
- shared — any dependencies that are listed here will be loaded once and shared between parent and children. Instead of listing each out individually, we have just imported the our dependencies from package.json
- HtmlWebpackPlugin — our bundled JavaScript will be served using the './public/index.html' file
Almost there! All we need to do now is add a script into package.json so that we can have webpack serve our application:
// package.json

{
  "name": "helloReact",
  "version": "1.0.0",
  "scripts": {
    "start": "webpack serve --config=config/webpack.dev.js"
  },
  "dependencies": {
    ...
Fire up a terminal and type “npm run start” and let's go test out our app:

So now we've got our simple react app, let's get started on our container.
Container
I'm going to stick with React for the container, as that's what I'm most comfortable with, but there's no reason you couldn't use another framework if you want.
Create a new repo or folder if you're going the monorepo approach like me. You should be able to copy across these files with minimal changes:
- package.json — change the name value to be “container”
- public/index.html — change the id to “root”
- src/index.js — no change required
The config is quite similar, but because this is the container, we're consuming remotes rather than exposing them. We'll need to make some changes to the ModuleFederationPlugin and we'll move our HtmlWebpackPlugin code to the common file as this will be the same between dev and production environments. These are the new files:
// container/config/webpack.common.js

const HtmlWebpackPlugin = require('html-webpack-plugin')

module.exports = {
    module: {
        rules: [
            {
                test: /.m?js$/,
                exclude: /node_modules/,
                use: {
                    loader: 'babel-loader',
                    options: {
                        presets: ['@babel/preset-react', '@babel/preset-env'],
                        plugins: ['@babel/plugin-transform-runtime'],
                    }
                }
            }
        ]
    },
    plugins: [
        new HtmlWebpackPlugin({
            template: './public/index.html'
        })
    ]
}
// container/config/webpack.dev.js
const { merge } = require('webpack-merge')
const commonConfig = require('./webpack.common')
const ModuleFederationPlugin = require('webpack/lib/container/ModuleFederationPlugin')
const packageJson = require('../package.json')
const devConfig = {
mode: 'development',
output: {
publicPath: 'http://localhost:8080/'
},
devServer: {
port: 8080,
historyApiFallback: {
index: '/index.html'
}
},
plugins: [
new ModuleFederationPlugin({
name: 'container',
remotes: {
helloReact: 'helloReact@http://localhost:8081/remoteEntry.js'
},
shared: packageJson.dependencies
})
]
}
module.exports = merge(commonConfig, devConfig)Notice that we've changed the port to 8080.
The other change is to remove the filename and exposes options and to add in the remotes object instead. This is where it's very important to match what's in your child webpack config. “helloReact” corresponds to the name provided previously. The localhost address is where our container will go to fetch the JavaScript for our child app so it will need to match exactly. The filename we provided in the child will also need to be the same here.
Now let's actually use our child components within the container.
We'll create our src/bootstrap.js file to render our application to the DOM:
// container/src/bootstrap.js

import React from 'react'
import ReactDOM from 'react-dom'
import App from './App'

ReactDOM.render(<App />, document.querySelector('#root'))
Note the document.querySelector is accessing the div with id “root” — if you named it something different, you'll need to change it here too.
Next up is to create the App:
// container/src/App.js

import React from 'react';
import HelloReactApp from './components/HelloReactApp';
import { Route, Switch, Router, Link } from "react-router-dom";
import { createBrowserHistory } from "history";

const history = createBrowserHistory();

const Header = () => (
    <div>
        <Link to='/'>home</Link><br />
        <Link to='/react'>use react</Link>
    </div >
)

export default () => {
    return (
        <Router history={history}>
            <Header />
            <hr />
            <Switch>
                <Route path='/' component={HelloReactApp} />
            </Switch>
        </Router>
    )
}
I've added in a simple navigation header here so that we can click between home and /react.
Essentially what's happening in our App is that when the browser get's a request on the root of our application, it will mount the react child app. For that to happen though, there's one last thing we need to do — actually mount the child app on our container side by creating the HelloReactApp file you that is being imported:
// HelloReactApp.js

import { mount } from 'helloReact/HelloReactApp'
import React, { useRef, useEffect } from 'react'

export default () => {
    const ref = useRef(null);

    useEffect(() => {
        mount(ref.current)
    }, [])

    return <div ref={ref} />
}
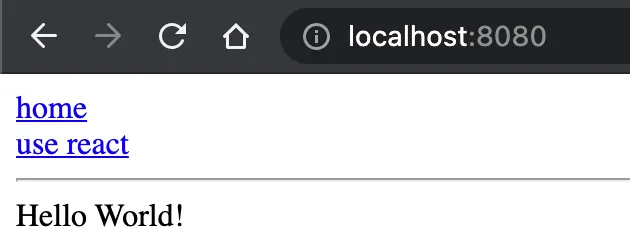
Now you should be able to run your container application (you'll also need to have your child app running in a separate tab) and see something like this:

Wow! This is exciting — we've got an application which has a navigation bar, coming from the parent and our “Hello World!” message coming from our child component!
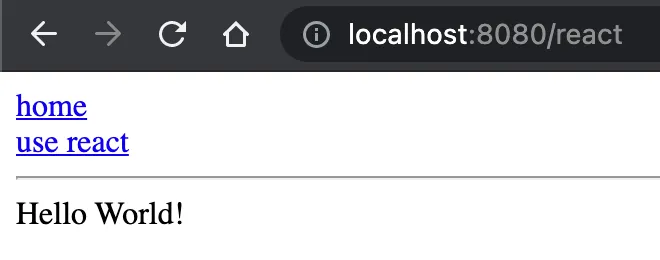
So what happens if we click the link to use react?

You can see that the URL has changed, but unfortunately our “Hello World!” message has not changed. We're going to need to make a few modifications to the way our application handles routing.
We're going to add a callback which will allow us to change path on the child component when the parent component makes a navigation change.
// helloReact/src/bootstrap.js

import React from 'react'
import ReactDOM from 'react-dom'
import App from './App'
import { createBrowserHistory } from 'history'

const mount = (el) => {
    const history = createBrowserHistory()

    ReactDOM.render(
        <App history={history} />,
        el
    )

    return {
        onParentNavigate({ pathname: nextPathname }) {
            const { pathname } = history.location
            if (pathname !== nextPathname) {
                history.push(nextPathname)
            }
        }
    }
}

if ("production" === 'development') {
    const devRoot = document.querySelector('#hello-react-dev-app')
    if (devRoot) {
        mount(devRoot)
    }
}

export { mount }
// container/src/components/HelloReactApp.js
import { mount } from 'helloReact/HelloReactApp'
import React, { useRef, useEffect } from 'react'
import { useHistory } from 'react-router-dom';
export default () => {
const ref = useRef(null);
const history = useHistory();
useEffect(() => {
const { onParentNavigate } = mount(ref.current)
history.listen(onParentNavigate)
}, [])
return <div ref={ref} />
}The main change here is that the mount function file will return an object containing the onParentNavigate callback. This means we can extract it in our parent application and attach it to a history listener. When the parent changes page, this function will get called and update the history within the child application as well.
Now you may be wondering what happens when our child application is the one to change pages. Let's add in some links and find out:
// helloReact/src/App.js

import React from 'react';
import { Switch, Route, Router, Link } from 'react-router-dom'

const helloWorld = () => (<div>Hello World!</div>)
const helloReact = () => (<div>Hello React!</div>)

export default ({ history }) => {
    return <div>
        <Router history={history}>
            <Switch>
                <Route path="/react" component={helloReact} />
                <Route path="/" component={helloWorld} />
            </Switch>
            <br />
            <Link to='/react'>Say hello to React!</Link>
            <br />
            <Link to='/'>Say hello to the World!</Link>
        </Router>
    </div>
}
After a quick refresh of localhost:8080 you should see the two links and clicking on them should work as you might expect.
I find this quite exciting that our parent and child applications can both navigate independently without having to couple the application together with router files.
And there you have it! A working micro frontend application. I hope you managed to follow along and that you learned something on the way.
You can find the source code for this tutorial on github.
Richard Bell
Self taught software developer with 12 years experience excelling at JavaScript/Typescript, React, Node and AWS.
I love learning and teaching and have mentored several junior developers over my career. I find teaching is one of the best ways to solidify your own learning, so in the past few years I've been maintaining a technical blog where I write about some things that I've been learning.
I'm passionate about building a teams culture and processes to make it efficient and satisfying to work in. In many roles I have improved the quality and reliability of the code base by introducing or improving the continuous integration pipeline to include quality gates.

